STEP 1: DICOM Convert
- Open Directories Selection GUI:
- Click the Utilities, DICOM Convert and then select the input file by clicking the … icon.
- Input Directories of DICOM Files:
- Directories can be navigated by operating folders in the left side panel or directories on the top. Folders matching the filter (Filt) are shown in the panel on the right and can be selected by clicking or dragging. Use the right mouse button if you would like to select all files. The panel at the bottom shows files that are already selected. Clicking a selected file will un-select it.
- Usage of ID Index:
- Using id index properly can help BRANT to find unique string for each subject. When id index is 1,it means the data folder contains subject string itself. 2 means subject information can be found in data folder’s parent upper one. e.g. if your data are stored in
G:/TestData/1_NC001, set id index to 1, if your data are stored inG:/TestData/1_NC001/fMRI, set id index to 2. Both output files will be put in the folderout dir/1_NC001.
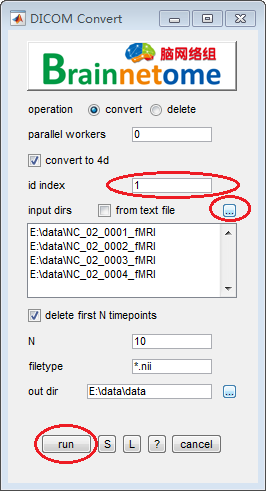
fig.1 Utilities => DICOM Convert
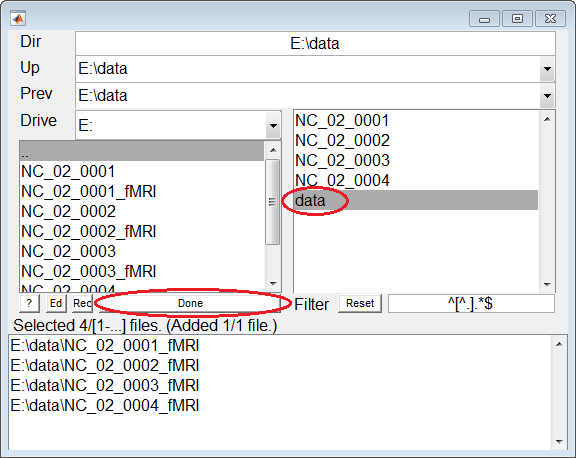
fig.2 Selection GUI