STEP 3: Visual Check and Head Motion Estimation
- Input Directories for Visual Check:
- Click the Utilities button, then Visual Check. Select the folders as input directories where STEP 2 outputs.
- Visual Check:
- Check the output. Arrow keys can switch the images among different timepoints or subjects during Visual Check. The images will be saved automatically.
- Head Motion Estimation:
- Click the Utilities button, then Head Motion Est. Select the folders as input directories where STEP 2 outputs. The results will be saved as
brant_headmotion_result.csvandbrant_headmotion_exclusions.txtautomatically.
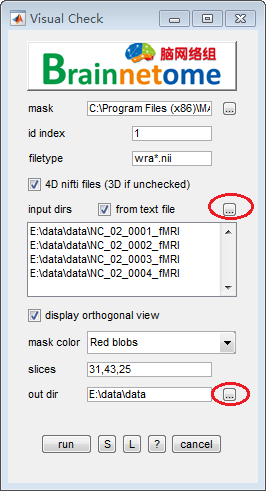
fig.1 Utilities => Visual Check
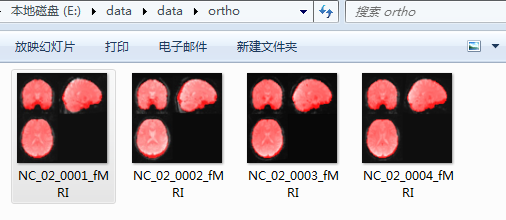
fig.2 Visual Check Output
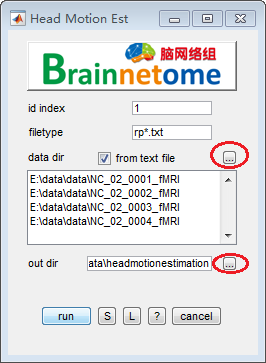
fig.3 Utilities => Head Motion Estimation

fig.4 brant_headmotion_result.csv
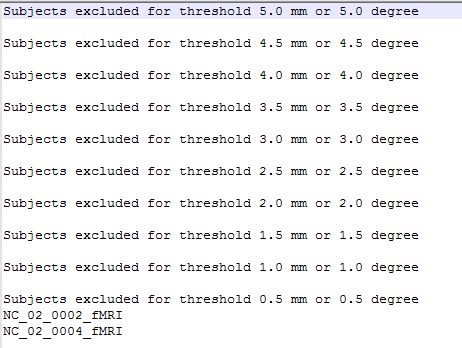
fig.5 brant_headmotion_exclusions.txt